The Ultimate Home Server Setup Guide for Developers
Relying solely on cloud providers to test, deploy, and host your personal projects can turn into an expensive habit pretty quickly. If you’ve ever felt the sting of a surprise AWS bill or hit the frustrating limits of a free tier, it might be time to look for a local alternative.
This is where building a homelab truly shines. Setting up a dedicated local environment hands you the keys to your own infrastructure, giving you the freedom to experiment without the looming dread of usage fees.
In this comprehensive home server setup guide for developers, we’ll walk through the entire process—from picking out the right hardware to mastering advanced containerization techniques. By the time you finish reading, you’ll be ready to run a secure, highly functional DIY cloud server right from your desk.
Why You Need a Home Server Setup Guide for Developers
It’s common for developers to kick off their careers heavily dependent on public cloud services. Sure, platforms like AWS, GCP, and Azure work wonders for enterprise scaling, but they often present a real headache for solo developers, hobbyists, and weekend tinkerers.
The main source of this friction comes down to aggressive resource metering. Because public clouds charge for every tick of compute time, bandwidth, and storage, costs can snowball fast—especially when you’re spinning up multiple staging environments or testing out resource-heavy databases. A single, innocent configuration mistake in your cloud development server setup can easily trigger a heart-stopping invoice at the end of the month.
Vendor lock-in is another major hurdle. The more you lean on proprietary cloud databases and managed services, the more tethered your application becomes to that specific ecosystem. Trying to migrate away later usually means facing a massive architectural rewrite. Developing on a self-hosted lab environment naturally forces you to adopt open-source, containerized tools that you can easily deploy just about anywhere.
On top of that, cloud environments completely abstract away the underlying infrastructure layer. Relying exclusively on managed services creates a real knowledge gap if you ever want to truly understand networking, virtualization, or DevOps principles. Building your own server gets your hands dirty, forcing you to learn exactly how these complex systems communicate behind the scenes.
Quick Fixes / Basic Solutions
You don’t need a massive rackmount server to get a homelab up and running. If you want a functional environment without sinking weeks into the setup, starting small is the way to go. Often, a simple, energy-efficient approach works best.
Here are the fundamental, actionable steps for a quick developer setup:
- Choose the Right Hardware: You can start with a mini-PC (like an Intel NUC), a refurbished Dell OptiPlex, or even a Raspberry Pi 5. Just make sure you have at least 16GB of RAM and a fast NVMe SSD so the system can handle multiple read/write operations smoothly.
- Install a Lightweight OS: Go with Ubuntu Server or Debian. These Linux distributions are rock-solid, incredibly well-documented, and consume a fraction of the system resources required by a standard desktop operating system.
- Configure SSH Access: Turn off standard password authentication and set up secure SSH keys instead. This guarantees you can safely access your server from your main coding workstation without leaving yourself vulnerable to brute-force attacks.
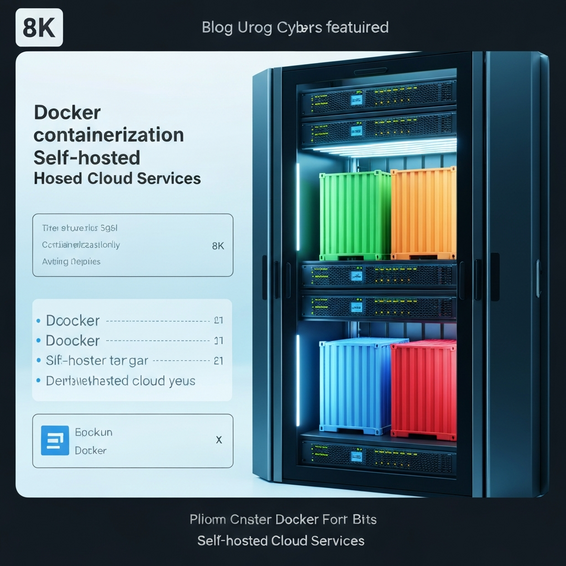
- Install Docker and Docker Compose: Modern containerization is by far the fastest way to deploy applications. Docker essentially eliminates the infamous “it works on my machine” excuse by strictly isolating your different development environments.
- Deploy Portainer: Consider using Portainer to visually manage your containers via an intuitive web interface. It makes monitoring error logs and restarting failed services a breeze compared to using the command line for everything.
A thoughtfully structured docker-compose.yml file acts as the backbone of any modern developer setup. Rather than manually spinning up individual containers, Docker Compose lets you define your entire application stack—frontend, backend, and database—right inside a single configuration file.
Taking these initial steps yields a surprisingly capable server perfect for hosting APIs, testing out new databases, or running local scripts. Throwing artificial intelligence into the mix can also be a massive boost to your workflow. If that interests you, check out our detailed guide on how to automate daily tasks using AI.
Advanced Solutions
Eventually, you might outgrow a simple Ubuntu Docker host. When that happens, it’s time to approach your lab from a senior IT perspective. Advanced setups unlock high availability, smarter hardware resource allocation, and fully automated deployment pipelines.
Instead of relying on a standard bare-metal OS, consider installing a Type-1 Hypervisor like Proxmox VE. Whenever the debate of “Proxmox vs Docker home server” pops up, the best answer is usually to use both. Proxmox lets you run multiple virtual machines (VMs) and lightweight LXC containers on a single physical machine, allowing you to securely nest Docker inside those isolated VMs.
Your next move should be implementing Infrastructure as Code (IaC). By using tools like Terraform or Ansible to automate the provisioning of your virtual machines, you protect yourself against hardware failures. If a server crashes, you can effortlessly rebuild the entire environment from scratch with just a single command.
If you’re focusing heavily on modern cloud-native applications, setting up a local Kubernetes cluster via K3s or MicroK8s proves absolutely invaluable. It faithfully mimics a complex production cloud environment, except it’s running right there in your living room.
Finally, bring it all together by setting up a CI/CD pipeline using GitLab CI, Jenkins, or Gitea Actions. By configuring webhooks, pushing code from your laptop can automatically trigger a build and deploy it directly to your local server. For instance, if you’re developing custom CMS features, you can push the code and instantly test it on a live local domain—which is incredibly helpful when you’re learning how to build WordPress plugins from scratch.
Best Practices
Maintaining a healthy home server requires a bit of vigilance. Just because your hardware sits safely behind your home router doesn’t automatically mean it’s immune to cyber attacks, malware, or sudden data loss.
First and foremost, prioritize network security. Avoid exposing your server directly to the internet through basic port forwarding. Instead, use a secure tunnel like Cloudflare Tunnels, or set up a local VPN using Tailscale or WireGuard. Taking this route keeps your system essentially invisible to malicious network scanners probing from the outside.
Network segmentation is another crucial best practice when designing a homelab networking setup for coding. You really shouldn’t put personal devices—like smartphones and smart TVs—on the exact same network as your exposed web services. A better approach is to use a managed switch alongside a dedicated firewall to create Virtual LANs (VLANs).
Next, make sure you implement the trusted 3-2-1 backup strategy. Always keep three copies of your data, stored on two different media types, with at least one copy secured offsite. Tools like Proxmox Backup Server or Restic can easily automate encrypted backups, sending your data to both a local external hard drive and a cost-effective cloud storage bucket like AWS S3 or Backblaze B2.
Lastly, establish proactive system monitoring. By installing the TIG stack (Telegraf, InfluxDB, Grafana) or using Prometheus paired with Grafana, you can keep a close eye on your server’s CPU, RAM, and network usage in real-time. Having a clear view of your system’s health metrics is the best way to prevent unexpected downtime before it happens.
Recommended Tools / Resources
To squeeze the most value out of your developer home lab, it pays to stick with industry-standard open-source software and widely vetted hardware components.
- Proxmox VE: Arguably the best free, open-source hypervisor available for home virtualization.
- Docker & Docker Compose: Non-negotiable essentials for efficiently containerizing and managing your applications.
- Tailscale: A brilliant, zero-configuration mesh VPN that lets you securely access your server remotely—even from a public coffee shop network.
- Nginx Proxy Manager: A simple yet effective reverse proxy featuring a clean web interface. It makes routing traffic and managing local SSL certificates surprisingly painless.
- Pi-hole: While known as a network-wide DNS ad blocker, it also serves beautifully as a local DNS server for handling your custom local domains.
If you’re currently in the market for a reliable machine, consider browsing through the refurbished micro-desktop computers on Amazon. Brands like Lenovo (ThinkCentre) or HP (EliteDesk) consistently offer an unbeatable performance-to-cost ratio for developers building their first setup. (Note: We may earn a small commission from affiliate links, which helps keep this technical blog running!)
FAQ Section
Do I need a static IP for a developer home server?
No, paying for a costly static IP isn’t necessary. You can easily rely on dynamic DNS (DDNS) providers or secure tunneling tools like Cloudflare Tunnels and Tailscale. These solutions safely route external traffic right to your server, entirely bypassing the headache of constantly changing IP addresses.
How much RAM does a home server need?
If you only plan on running basic Docker containers and simple web apps, 8GB of RAM is generally enough. However, the moment you start spinning up multiple virtual machines, enterprise-level databases, or a local Kubernetes cluster, upgrading to 32GB or 64GB of RAM becomes highly recommended.
What is the difference between a NAS and a home server?
A Network Attached Storage (NAS) device is primarily built for mass data storage, backups, and safe file sharing. While it’s true that modern NAS devices can run basic Docker containers, a dedicated home server packs significantly more computing punch. It offers advanced virtualization capabilities and superior flexibility for hosting complex development environments.
Is running a home server expensive?
The initial hardware investment usually ranges from $100 to $500, depending heavily on whether you buy used or brand-new parts. Fortunately, ongoing running costs are generally quite low. A modern mini-PC typically draws between 10W and 30W of power, translating to just a few extra dollars a month on your electricity bill.
Conclusion
Tackling your own local infrastructure is easily one of the most rewarding and educational projects a developer can undertake. Hopefully, this complete home server setup guide for developers has equipped you with the foundational knowledge you need to finally break away from restrictive, overly expensive cloud environments.
Whether you start with a simple Docker host or jump straight into advanced virtualization with Proxmox, sticking to core security best practices will ensure your environment remains highly reliable. There’s no reason to keep paying those outrageous hourly cloud rates when you can manage everything yourself.
So, grab a capable refurbished PC, install your favorite Linux distribution, and confidently launch your very first container. Happy homelabbing!